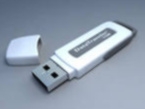
Recover information from a flash drive yourself.
Recover information from a flash drive yourself
It's no secret that today a flash card is the most convenient and reliable storage medium that almost everyone uses. However, the problem of data protection may arise here too.
Recover files from a flash drive
If you cannot open a flash drive or any file/folder on the flash drive or copy a file/folder, do not panic: recover files from a flash drive is possible. As a rule, the following error messages appear on the screen: «the disk in the device is not formatted. Format it? Yes/No»; «no access to <letter_of_removable_disk>; The file or folder is damaged. Reading is impossible»; «input/output errors on the device». The computer properties indicate a complete absence of USB devices. In order to recover files from a flash driveyou need to do several steps: first, reboot your computer; remove the flash drive from the slot and then reinsert it; check the removable disk; format — “Disk not formatted” — click Yes — Format Removable disk — Format methods — Quick (clean up the table of contents) –> Start.
Recovering data after formatting a flash drive
Next, in the <Format Removable Disk> window with the message «Attention! Formatting will destroy ALL data on this disk. Click «OK» to start formatting, «Cancel» to cancel it» –> click OK. From this moment, data recovery after formatting a flash drive begins. When formatting is complete, a window will appear with the message Formatting complete –> click OK; then close the <Format Removable Disk> window. The flash drive opens, but shows no data on it. Data recovery after formatting a flash driveis carried out using a data recovery program, for example, EasyRecovery Professional, which you can download. You need to install and run this program, this is how it is done: in the main program window, select «Data Recovery» in the menu; in the next window, select FormatRecovery (= Recover data after formatting); then the system will be scanned, a window will appear warning that the files to be recovered need to be copied to another disk), click OK; in the next window, select the reformatted partition, select the previous file system in the drop-down list, click Next; the Scanning files window will appear (the file system scan will begin); after the scanning is complete, mark the files you want to recover, click Next; select the destination where the data will be copied to by clicking Browse –> Next; the Copying data window will appear (that is, the recovery process will begin); when copying is complete, click Finish; in the Saving recovery window that appears with the message Do you want to save the state of your recovery to continue later? — click Yes if you want to save, or No if you do not need to save. Data recovery after formatting the flash drive is complete.
Recover information from the flash drive, in some cases, it is possible without the formatting process (it can be done after recovery, for uninterrupted further operation of the flash drive). To do this, you need to start data recovery in the RawRecovery program. When recovering, data is copied to another medium (for example, to a hard drive), and not to the one that is being recovered. First, files are searched for, then you select which files you want to recover, then the files are recovered and copied to another medium.
Recover information from a flash driveYou can also use the R-Studio program. The program is installed on a physical disk. After selecting a drive or partition, on the left side of the interface, start the scanning operation by clicking the «Scan» button from the control panel. Then you can immediately click «Open Drive Files» (without preliminary scanning). Configure the scanning parameters in the «File Systems» list. Click the «Scan» button. The speed of the scanning process depends on the state of the drive. After the process is complete, a drop-down list of possible options for information location maps will appear under the icon of the scanned drive. Good options are highlighted in green, questionable ones in yellow, and bad ones in red. Wait until the process of building a directory tree is complete. By ticking the check boxes next to the file system objects, select the files and folders you want to recover, then click the «Recover Marked» button. In the window that appears after clicking the «Recover Marked» or «Recover» buttons, select the path to which the recovered information will be saved and click OK.

Добавить комментарий